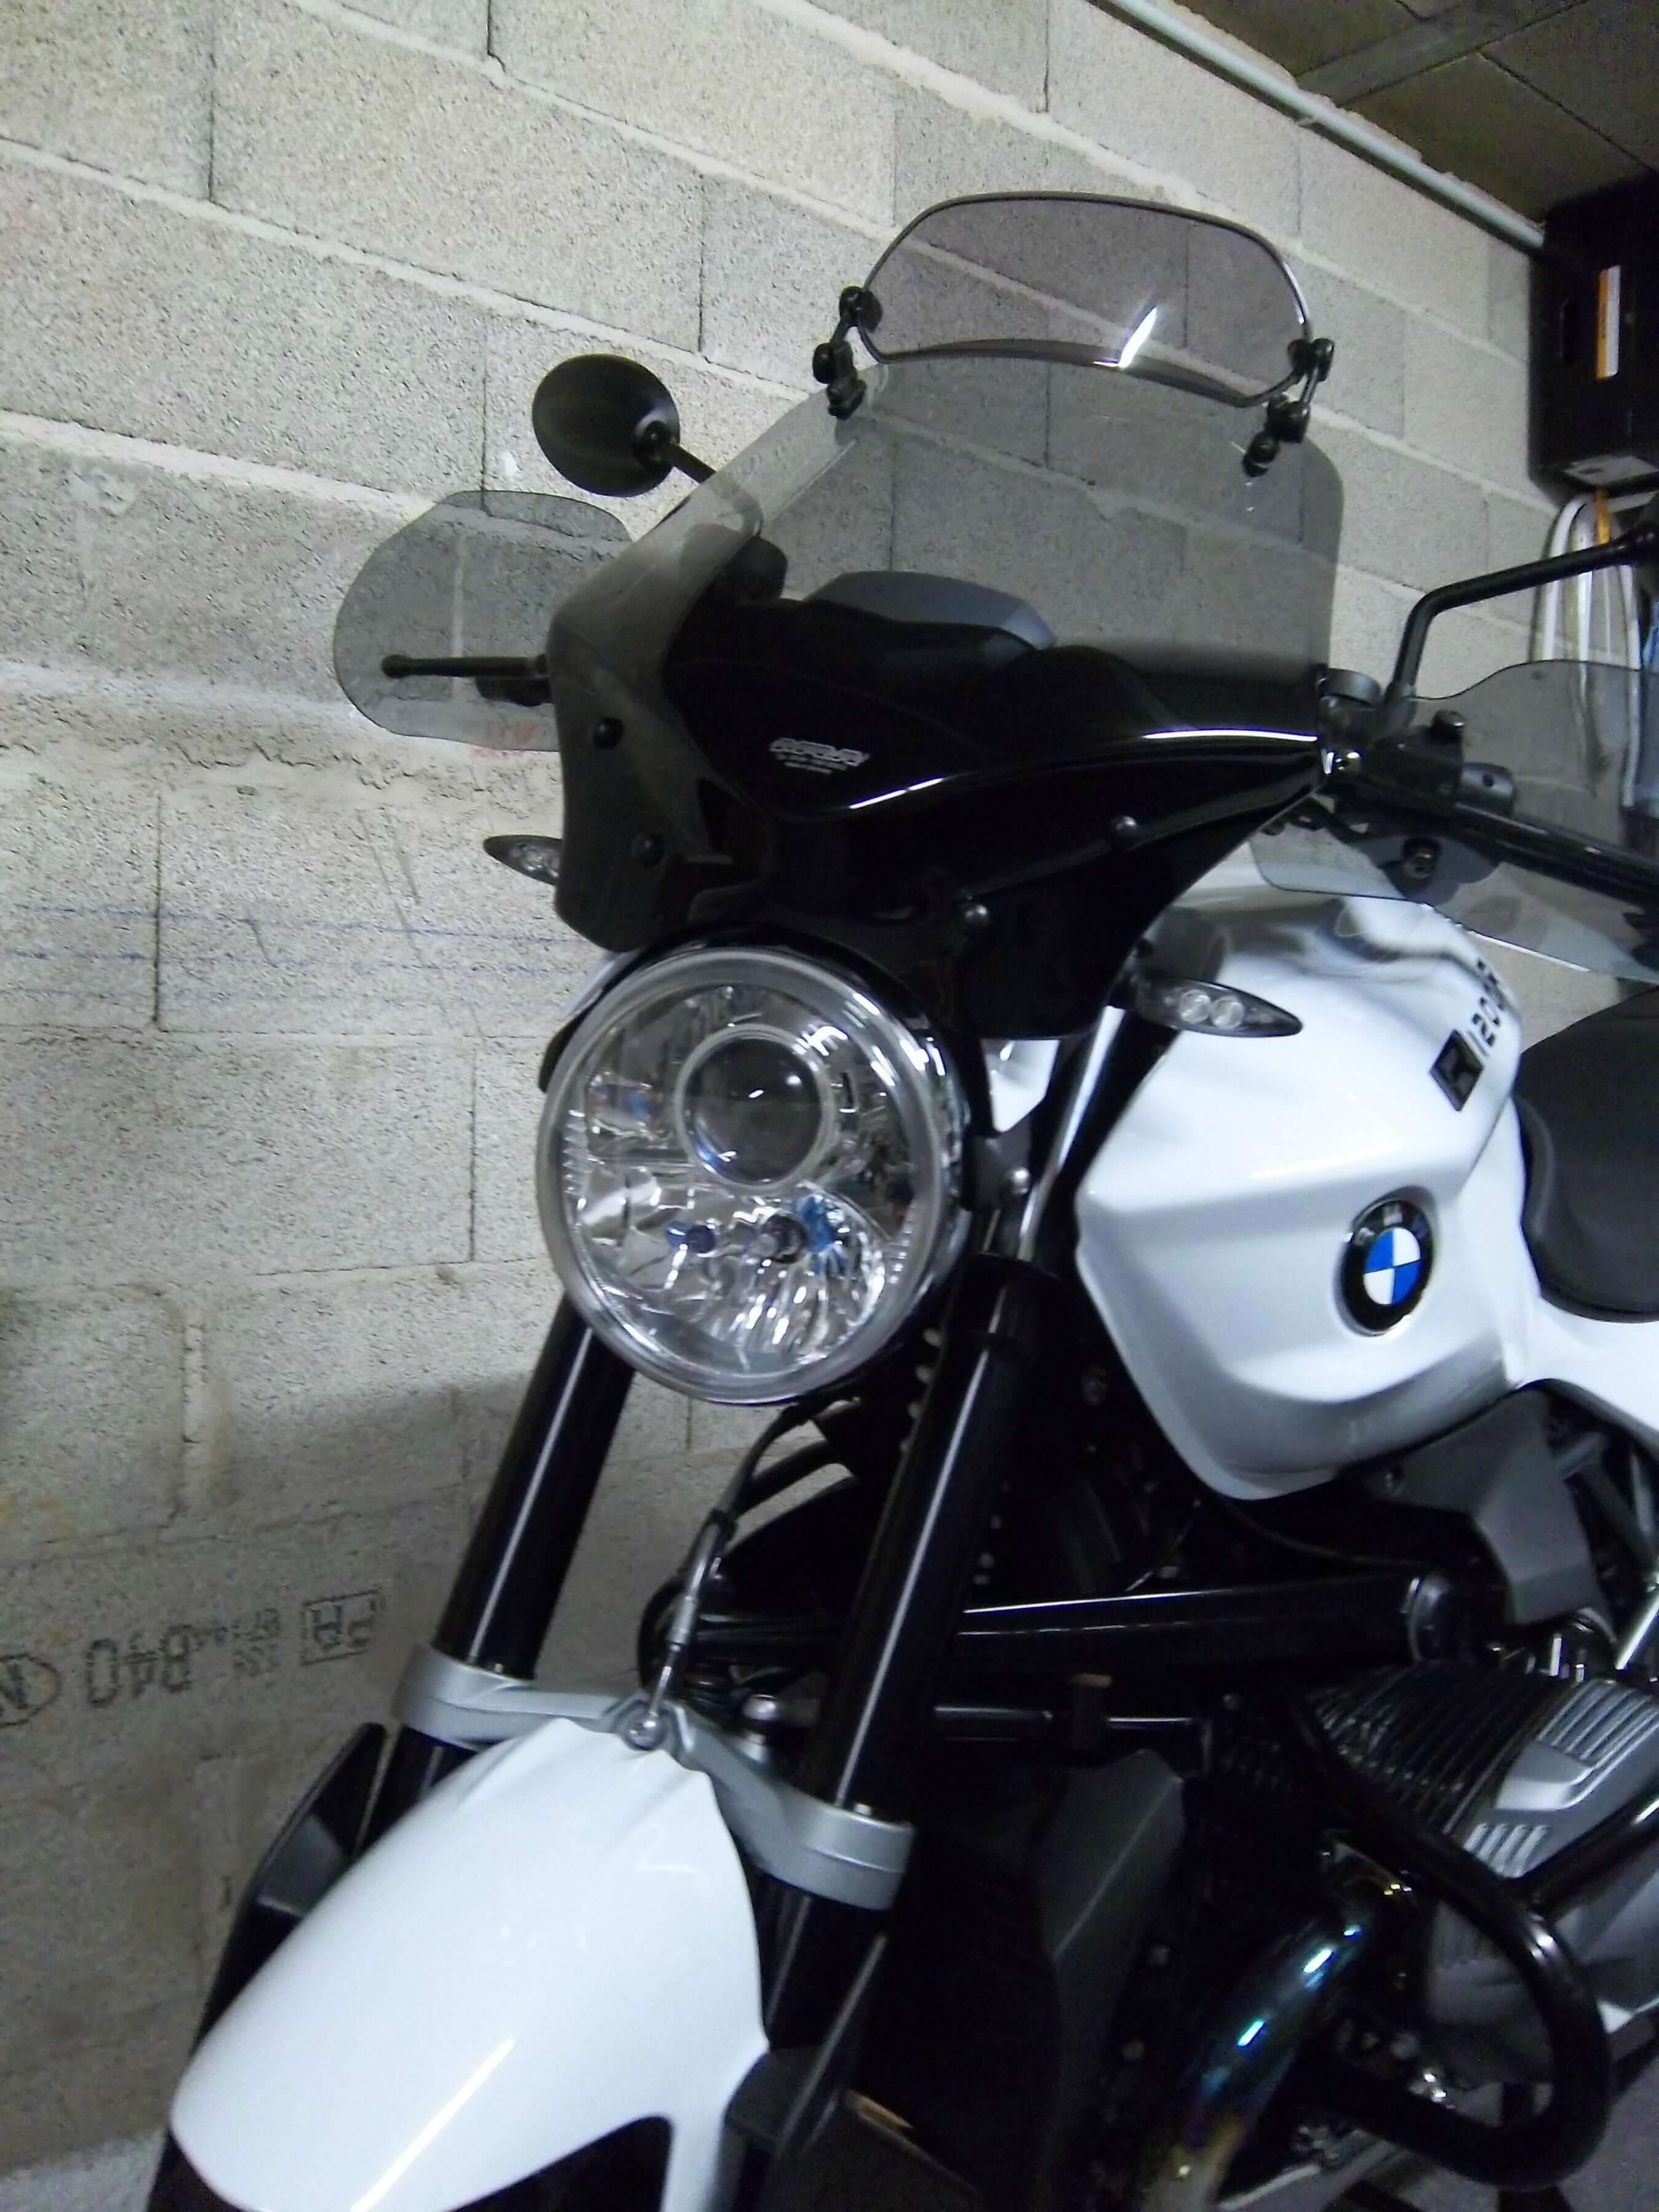
Few months ago, I installed a bi-xenon projector on my BMW R1200R, and I would like to share it with you. The most important think is to choice a good bi-xenon projector in term of lighting quality and dimensions. In the web you find a lot of projectors coming from China (DH-gate site for example), with several lens dimensions. Rule:the higher lens diameter is the higher output light is. But we have to be careful on two points: bi-xenon projector mustn't go out the glass of the original headlamp and the most important point, the rear of the bi-xenon modulus must be short to avoid contact with the black plastic external housing. After few days of research I decided to order the next one (it is available for left and right hand traffic), I chose mini H1 projector 6.0 right hand traffic with mini gatling gun shroud): without ballast Mini H1 Bi-xenon projectors 6.0 - Xenon Projectors with ballast Bi-xenon Mini Motor Kit - Projector Kits According to the web site projector 6.0 gives the best output light. I also chose a small diameter shroud to be sure that it doesn't interfere with original reflector. So this is the contents of retrofilab kit (no ballast present because I have already a X3 canbus one:

comparison of low beam light output (original headlamp on the left hand side, bi-xenon modulus on the right hand side) you can note the specific horizontal cut off line for xenon with a gap on the centre (it is asked by regulation, for not blinding opposite drivers)

step 0: check of the dimensions to be sure that it is possible to put modulus inside the headlamp:

now the assembly step 1: remove the original projector from the bike - 1 screw fixes the chrome-plated ring under the housing - 1 screw fixes the headlamp at the top of the housing. - Then disconnect the wires and the bulbs.
step 2: separate the glass from the reflector: it is the most difficult mission. Glass is not bonded by a sealant which comes liquid when you heat it. Is it a permanent compound called "Permaseal". (I didn't know it, when I did this work). I put the headlamp in the over ( temperature 100°C) during 30 minuts and impossible to separate the parts. I increased the temperature by steps of 10°C until 150°C (30 minuts) and I managed to separate them by using a plate screw driver (make lever between the glass and the reflector) . but I broke some parts of the flange.


step 3: clean and remove all "Permaseal" on glass and reflector? Keep all broken parts.

step 4: as the thread part of the modulus at the rear is short, it is necessary to cut the next area and drill a hole (10mm diameter) to get high beam wires over (just under the first one):


step 5: setting and fixing the modulus inside the reflector. (it is a recommended option lol) if you look at well, you will see that the internal face isn't flat. there are several levels of parabolic areas (see green arrows). Then, if we put directly the modulus against theses areas, it will not be in the good direction. The modulus will be tilted down (because of the internal reflector shape) and the high beam of bi-xenon modulus and the high beam of original headlamp won't be in the same direction. To have exactly the same light output direction I decided to put some shims (aluminium adhesive tape) either on the modulus (like me) either on the reflector (best and easiest solution).


after that you can fix the modulus by tightening the nut (please note that I inserted a washer in order to have a flat contact with the nut,) be careful, do not tighten a lot! I did that and a crack appeared  . I stopped it by drilling a small hole

The next photo shows the bi-xenon low beam and the halogen original high beam are in the same direction (good job but very long time necessary do to it):

at this moment setting isn't finished. as we have not rotation stop, it is necessary to adjust it. My solution was: - to mount the reflector with the modulus on the bike - put the bike on its centre stand to switch on xenon low beam and to turn the modulus in order to have an horizontal cut line , like this:

step 6: repair the reflector (for me !) I glued all small parts of the flange and I reinforced it by lay up wet glass fibre + high temperature resin epoxy.
step 7: weld the wires connector of "high beam" modulus to the original wires:

step 8: drill a hole on the external housing in order to get over all bi-xenon module wires.

step 9: put the glass on reflector. connect the original wires to the modulus wires and insert the whole in the black external housing. Screw it, and the chrome-plated ring. Connect external wires to the ballast and drive (in the night) to see if the orientation of the modulus is good, if not remove the glass and adjust the modulus in rotation. If it is ok you can bond the glass to the reflector by a silicone sealant. it is better to make a real drive test because by running than putting the bike vertically on the dark tunnel before (left) / after (right)

on the bike:

I really enjoyed doing this work, even if I spend much time and even if I had some issues to solve. the output light quality is very impressive comfortable and the design is fabulous. it seems that it is a brand new BMW R1200R version. Source: pierre on R1200R forum Order this kit directly:
In this kit the following parts are used: - Aharon speedstart CANBUS ballast - Mini Gatlin Gun shroud - H1 XB35 4300K or 5500K bulb for the best light output


Comments (0)